Fall Fruit and One Furry Fella

Yikes.  It’s been over two months since I’ve last written on this blog.  Once I stopped writing for a while, the idea of posting another update or recipe became more and more daunting.  On top of that, I wasn’t sure what to write about.  I wasn’t cooking much.

The past few months have had their share of highs and lows.  Being admitted to the hospital three times within a three week period was definitely a low.  So was spending a consecutive 25 days there and missing my sister’s wedding.  But my family visited frequently, I saw friends I hadn’t seen in a long while, and… (drumroll please!) I finished intensive chemotherapy!!

Huh?

Since last January, my chemo schedule has been pretty rough.  I hadn’t had too many healthy days, and I constantly camped out in bed.  Many weeks included 3 or 4 trips to outpatient therapy for chemo or blood, and I think we all know how prone to fevers I am.  Lots of time spent in the hospital.  Even when I was given drugs that normally help or don’t hurt too much, my reaction was quite the opposite.  So I’m glad to have that chapter behind me.

Now, once my counts recover and I can resume treatment, I will have two years of maintenance therapy to get through before I can say, “Phew!”  This treatment isn’t meant to bring down my blood counts or make me feel ill, so if it does either of these things, I will most likely take lower doses.  Unfortunately, some of the main drugs I will be taking are ones to which I respond poorly.  I’m hoping that taking lower doses will mitigate those side effects.  Because this therapy is primarily meant to maintain my remission, I get to regain my strength, grow my hair out, eventually go back to work, and travel a bit.  I have never been (and never will be) more excited to spend Christmas in Schenectady.

But in the meantime, I’m happy to hang out with Winston a.k.a. Mr. Wubbie a.k.a. Bubba Ghanouj.  This is what he’s been up to lately:

This slideshow requires JavaScript.

It’s a pretty chill hangout.

I’ve had a nice break from chemo now, and I have a few more days to enjoy it (my treatment resumes this Thursday!)  So I’ve gone back to the kitchen, trying out some Fall-inspired recipes and drinking lots of cinnamon tea.  Below are a few ideas that make eating a neutropenic diet a lot more enjoyable this time of year.


One of my favorite things about Fall is the abundance of apples.  They’re my favorite fruit, hands-down.  The season brings so many different types, you could cut up one of each and serve an apple fruit salad.  Southwestern PA has its share of tasty varieties, but nothing compares to an apple from Western NY.  I’m sorry folks, it’s true.  My mom recently brought down a bag of baking apples, and the minute I sliced into the first one, I did the happy dance.  They smell so floral, yet earthy.  Basically the best thing ever.

Right now, as my counts recover, I’m slightly neutropenic.  I’ll eat a raw apple here and there (very well scrubbed!!), but I want to be cautious because, as I’ve learned time and time again, hospital bills are expensive.  So apple sauce; apples, sausage, and cabbage; and baked apples are my go-to’s.  I made the latter a few nights ago, just using whatever I had around.  Here’s a rough recipe:

Ingredients:

  • 2 baking apples (I used a few different green varieties)
  • 2 handfuls of raw walnuts, about 1/2 cup
  • 2-3 handfuls of Quaker oatmeal squares (Yes, the cereal.  I only had steel-cut oats, and that didn’t seem appetizing.)
  • 3-4 tbsp. maple sugar (Brown sugar is fine, but again, I had none on-hand.)
  • 1 1/2 tsp. cinnamon
  • Dash of nutmeg
  • Dash of allspice
  • 2 tbsp. butter
  1. Preheat oven to 375, and put on water to boil.
  2. Slice apples in half and scoop out core.  Arrange them in a shallow glass or Corningware dish, skin facing down.
  3. Roughly pulse dry ingredients in a food processor.
  4. Pour mixture into apple halves, heaping any extra on top.
  5. Top each half with 1/2 tbsp. butter.
  6. Pour 1/4 cup boiling water into the bottom of the pan.  Bake in oven for 30-45 minutes, or until apple is soft, but not falling apart.
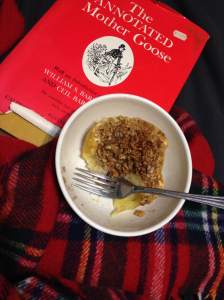
Perfect with a good book.

Perfect with a good book.

The crunch of the topping contrasts the apple’s soft texture so well.  Don’t overdo the nutmeg and allspice, or else it will taste bitter, but I say add more cinnamon if you want!  ‘Tis the season.

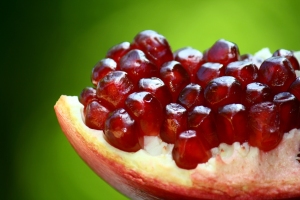
If you really want some fresh fruit and are really tired of eating bananas and oranges, as I certainly am, eat a pomegranate.

Supposedly, every pomegranate has 613 seeds.  I dont know if I believe that.

Supposedly, every pomegranate has 613 seeds. I don’t know if I believe that.

The thick skin makes it neutropenic-friendly.  I know what you’re thinking- easier said than done.  That’s because you’ve been deseeding your pomegranates by breaking them apart in a bowl of water and sifting the flesh off the top.  Well, be glad you’ve read this post this far, because boy, do I have a treat for you.  I found this video about a month ago and haven’t feared picking up the fruit at the market since. Just score it around the center, pull it apart, and smack it with a spoon until all the seeds fall out.

I leave you with the simplest pizza ever, as shared with me by my friend Christina.  My boyfriend and I made it a few weeks ago, and it’s definitely our new favorite.  And it involves two things not often allowed in a neutropenic diet: pears and gorgonzola!  I am a HUGE fan of all blue cheeses and have missed them dearly over the year.  But since this pizza is baked, it’s safe to eat.

Just layer gorgonzola, pear, then gorgonzola again.  Bake at 400 for 10-13 minutes, then add walnut pieces for the last few minutes.

Just layer gorgonzola, pear, then gorgonzola again. Bake at 400 for 10-13 minutes, then add walnut pieces for the last few minutes.

We waited to take it out of the oven until all of the cheese was bubbly.  There were no leftovers.

I will plan to write an update shortly after my maintenance phase begins.  Thanks for reading, and enjoy these Fall fruits!
 

Don’t Buy…DIY!

I’ll be honest- I’ve just started to cook again these last several days, after a horrible phase of treatment and a trip to the hospital.  Methotrexate is my biggest rival, and if you don’t know what it is, I hope you never have to. Hint #1 that it will make you feel like curling up and hibernating: the IV infusion looks like lemon-lime Gatorade is about to run through your veins. Funny, because I often count on Gatorade to make me feel better.

HOWEVER, I did make two snacks that I would normally buy from the store: popsicles and crackers. That about evens it out, right? They are so easy to make, and doing it yourself means that you only have yourself to blame when they aren’t sweet/savory/creamy/crunchy enough!

Also, popsicles and crackers happen to be the world’s top go-to foods when someone’s sick.*

*Not a fact, but probably.

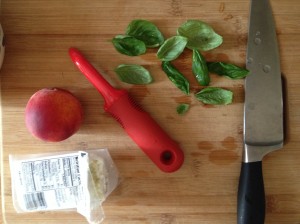
My birthday was on the 4th, and my wonderful boyfriend bought me a Zoku popsicle maker. I’ve been crazy about popsicles my whole life and have fond memories of sharing one with my childhood dog on super hot days (like you never did the same thing…)  After a few discouraging tries- you really have to blend the ingredients and store the pop maker in the back of your freezer– I made a delicious frozen treat from fresh, local ingredients, and with a secret helping of protein!  The best part is, you can just use whatever’s lying around.

With just a few ingredients...

With just a few ingredients…

I made a wonderful peach, basil, and goat cheese popsicle!

I made a wonderful peach, basil, and goat cheese popsicle!  Adding a bit of almond milk keeps it creamy.

This has been a saving grace because most store-bought popsicles have too much citric acid in it, and they irritate an already sensitive GI tract.  If you like a bit of decadence, try blending some cocoa, milk, peanut butter, a dash of salt, and your favorite sweetener.  It makes for a nice fudge pop!

Since I had chemo on my birthday, we stayed in that night and made pizzas.  Super fancy delicious pizzas because I was feeling well enough to eat something flavorful. We topped them with goat cheese, sun-dried tomatoes, ramp leaves (had some in the freezer), mushrooms, garlic, onion, prosciutto, and truffle oil!  I ate the leftovers for breakfast.

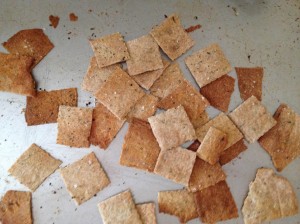
But we still had a small ball of dough left, so I decided to make some homemade crackers!  All you have to do is roll the dough out SUPER thin and bake it at 400º until golden brown and crispy.  Keep watching them, though- those suckers can go from perfection to overdone in seconds.

Rustic.

Rustic beauties.

As I wasn’t too keen on protein this week, I hid some extra grams in the crackers, too.  I shredded about an ounce of cheese and folded it into the dough with some sage and thyme.  Before putting it in the oven, I sprinkled some sea salt and fresh ground pepper over the sheet.  I did cut lines in the dough, so that they’d easily break into squares.  However, the outside cooked much faster.  Next time, I will separate the squares for more even baking.

If you’re not into cheese, try adding nutritional yeast instead.  It will give you that same nutty flavor and a nice helping of protein.  In a few months, it will be pumpkin season- adding a few spoonfuls of canned pumpkin, a bit of brown sugar, and your favorite winter spices, will turn this snack into a sweet treat.

So there you have it:

  • No more spending tons of money on these easy-to-make snacks.
  • You can finally eat popsicles without irritating your stomach.
  • Don’t want to eat tons of protein?  That’s OK- you can get protein, anyway!

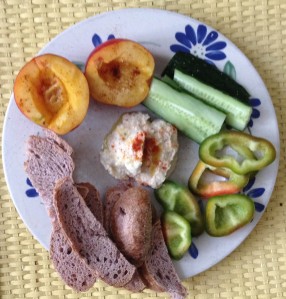
Well, I shall leave you with a bit of bragging: I’m not neutropenic right now!  I have been going crazy over fresh produce.  Here’s what I had for lunch today:

IMG_0241

Zucchini baba ghannouj with little toasts, fresh veggies, and a nectarine sprinkled with chili powder for dessert.  The baba ghannouj can be made neutropenic-friendly quite easily.  Stay tuned for the recipe!


What’s in the Box?!

My parents are currently dealing with a homeowner’s disaster.  A pipe broke in their upstairs bathroom, soaking the first floor ceiling and causing lots of damage.  Long story short, their kitchen is being taken over by contractors for a while, and they have to do a lot of microwaving and dining out.  I can’t even imagine.

But it got me thinking about all of the pre-made meals I’ve been eating when I don’t have the energy to make my food from scratch.  I’ve had some great ones, some okay ones, and some spitting-it-out-right-now ones.  So today, I’m going to do a product review!  But mostly of the great ones, because I like to keep things positive.  The brands that I buy are easy to find in urban areas and probably just a short drive in rural areas.

Note: I’m from Western New York.  Therefore, I worship Danny Wegman.  I own a Wegmans baseball cap (thanks to my bestie who’s worked for the company since high school and has really worked her way up.  Wegmans takes care of their employees.)  I also have this Wegmans truck Pez dispenser my parents got me:

How I feel when I’m at Wegmans’ Asian food buffet loading up on the kimchi and spring rolls.


I had to say that because none of the following products are Wegmans products, and I didn’t want you to think that aliens took over my brain my heart.  They have a few stores in the Philly area, but not close enough for me to go grocery shopping there.  If there was one close by, I would just send you the link to their food inventory and let you know that everything tastes as good as deep-fried Snickers bars, covered in melted gold and sprinkled with diamonds. Aw hell, in case you live near one, here ya go.

Anyway.  Without further ado, here are my 5 favorite pre-made meals:

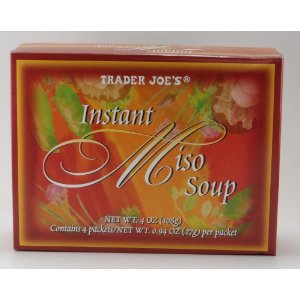
1) Trader Joe’s Instant Miso Soup:

Source: Amazon.com

Source: Amazon.com

It comes with 4 two-serving packets of dried miso, scallions, and tofu (but not enough to be substantial).  Miso isn’t really allowed in a neutropenic diet, but that’s because of the probiotics.  Instead of removing the water from heat and stirring the miso in, keep it on a rolling boil for a few minutes after you add the packet.  You’ll kill the probiotics*.  The taste isn’t as fermented as it would be if you followed the directions, but it allows me to have one of my favorite comfort foods when I need comfort the most.

It’s also SOUP-er easy to add more veggies and noodles!

*So I’ve been told/have read.  There may be a few lingering around, but if I’m allowed to eat yogurt, I’d imagine a few probiotics won’t hurt.  Please scold me in the comments section if you disagree.

2) Evol. Beef Burritos:

Source: EvolFoods.com

Source: EvolFoods.com

These guys are quick to heat up, and they have a fair amount of protein and fiber in them.  They’re also very bland. WHICH IS A GOOD THING.  Keep them as is when you’re nauseous and finding it hard to eat anything.  If you want to upgrade it, just top it with some salsa, Tapatio (which we put on everything), and a spoonful of low-fat Greek yogurt.  They’re incredibly versatile and, unlike a lot of packaged foods, they’re conservative with the salt.

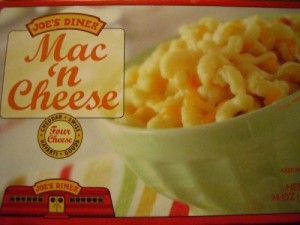
3) Trader Joe’s Mac ‘n’ Cheese:

Source: TraderJoesAddiction.wordpress.com

Source: TraderJoesAddiction.wordpress.com

This frozen stuff’s got a nice blend of cheeses- cheddar, havarti, gouda, and swiss.  And it’s so cheesy, you can eat it over two meals.  In fact, I strongly discourage you to eat the whole thing in one sitting.  So much cheese.  This is also a versatile meal; mix some cooked veggies in to help reach your 5/day, or add a scrambled egg for more protein.

4) Red Baron Singles French Bread Pizza:

Source: RedBaron.com

Source: RedBaron.com

I’ve had the Supreme and the 5 Cheese & Garlic versions.  These pack a lot of salt and fat, and they’re probably not that good for you.  But when you haven’t eaten much all day and nothing looks good to you, you will find solace in these frozen pizzas.  Easy to microwave or bake, and you only have to eat one to get a whole lot of calories.  Usually not a good thing, but when you have cancer, every day is Backwards Day.

5) Mrs. T’s Pierogies:

Source: Mrs. T's Pierogies

Source: Pierogies.com

I know I’m gonna get a lot of flack for this one.  Pierogies are a holy food that should only be made by old Polish women at the local church, yadda yadda yadda.  Folks, Mrs. T’s Pierogies are THE ULTIMATE sick person food.  I like the (cheeseless) potato and onion kind.  Boil them with some veggies, and they go down easy.  They fill you up really well, too. You can even add them to your instant miso soup!

I think the moral of the story is, don’t buy meals that have a ton of ingredients.  It’s a lot easier to add than to take away.  If you’re wondering, my least favorite meal is Trader Joe’s Garden Vegetable Lasagna.  The tastes are so off-balance, as is the ingredient ratio.  Really awful red sauce.

And a bonus:

A few days ago, we went grocery shopping at Whole Foods.  I was feeling really hungry and starting to get tired, and my boyfriend wasn’t going to be around for dinner.  So I did what any good WNYer would do- I picked up a container of pre-made hot wings.  (Just kidding; I’m not a good WNYer.  I bought HOT WINGS from WHOLE FOODS.)  When I got home, I heated up some frozen spinach with cider vinegar and made a packet of Betty Crocker’s dehydrated mashed potatoes to go along with them.  Voila!  Sometimes, we all need a 3-minute dinner.

Source: LordoftheWings.blogspot.com

Source: LordoftheWings.blogspot.com

Mmmm.


Ramps, ramps, everywhere!

Here’s the deal.  A lot of my ideas were thought up long before I decided to start a blog.  Which means there’s often no photographic evidence and almost no exact measurements.  So, I propose you use your imagination on a lot of this.  Like reading a book! (I’ll get better, I promise.)

Now that we’ve got that settled, let’s talk ramps.  Some call them wild leeks or wild onions.  They’re one of the most tender of the onion family, and they’re one of the first signs of Spring.  Like all early Spring veggies, they taste light and fresh, but they also pack a nice funky punch.  Because of their garlicky odor and oniony/garlicky taste, they can be swapped into many dishes for a lighter refreshing quality.  The bulbs are also juicy and so yummy raw.  But we can’t eat them raw, can we?  So we gotta get down ‘n’ dirty in the kitchen and find some ways to enjoy them thoroughly cooked.

First, can I just say that I LOVE washing ramps?  They get really dirty and there’s a slimy film around the bottom that you just sort of pinch off.  And the bulbs are so smooth, the dirt just slides right off.  And the roots snap off so easily and so, so cleanly. In short, cooking with ramps is a twofer: you get a delicious meal AND free therapy.

Our fridge has had an overload of ramps this season, both with the leaves and without.  Here, I’m highlighting just three of the dishes I’ve made so far: ramp pizza, ramp and pea soup, and Greek pasta salad with roasted ramp bulbs.  I only took pictures of the pasta salad.  (Let me remind you of the first paragraph I wrote.)

LOOK AT THESE BEAUTIES!!!

Source: wildwestvirginiaramps.com


Ramp Pizza:

I don’t have a real recipe for this, but I’ll just give you an idea of how I used them (fail), then suggest how you should actually use them (win).

First, I separated the greens and bulbs.  Then I sliced up the bulbs and sauteed them with mushrooms, onion, and garlic. (I’m a huge fan of alliums.)  I opted for a white pizza and added the sauteed veggies on top. **Always saute water-heavy veggies before putting them on a pizza crust, or you’re gonna have some soggy crust!

The green tops are more difficult.  For the first pizza, I left them whole and laid them from the center out for the last 5-7 minutes in the oven.  They were chewy, and the whole piece would come off with the first bite.  The second time, I tore them into small pieces and sauteed them with the rest of the veggies, adding them to the pizza in the beginning.  They were easier to eat, but they still remained somewhat chewy.  If that bothers you, you could leave them off…OR: make ramp pesto!

I’ve heard that ramp pesto is fabulous, and you could really throw in whole ramps, which is so much easier.  I’d suggest putting them in your food processor with some pine nuts, some olive oil, maybe some more herbs, and using it as the base sauce.

Source: lainesrecipebox.blogspot.com

Someone please get me more ramps so I can do this right!


Now that you’ve learned from my mistakes, let me wow you with the brightest, zippiest, snappiest soup ever to grace my kitchen.  Did I mention it’s super easy and is remarkably refreshing when served cold?  Here’s what you’ll need:

  • 2 cups frozen or fresh peas
  • 16 or so ramps (leaves and bulbs)
  • 1 yellow onion, coarsely chopped
  • 3-5 garlic cloves, minced or pressed
  • 3 cups chicken broth
  • 1 tbsp. butter
  • 2 tbsp. dried basil (Note: A strict neutropenic diet calls for all herbs to be cooked.  I don’t even bother getting fresh basil, especially since that hydroponic crap that’s suddenly EVERYWHERE tastes like nothing.  And smells like urine.)
  • Whatever grating cheese you have on-hand.
  • Salt and pepper
  1. Separate ramp bulbs and greens.  Chop up the bulbs and add them to your pile of chopped goodies (onions and garlic).  Chop or tear up the greens and set them aside.
  2. Grind the basil in a mortar and pestle.  Grind it REEL GOOD.
  3. Set your stock pot on medium-hight heat.  Sautee the bulbs, onions, and garlic in butter for 5-7 minutes.  You want them a little brown.
  4. Add the chicken broth, peas, and greens.  Bring to a boil, then lower the heat, cover, and let simmer 10-15 minutes.  Stir occasionally.
  5. Blend in food processor or immersion blender until thick, but still textured.  If you don’t trust your appliances, wrap a towel around the food processor so you don’t get flyaway hot soup in your face.  You also might have to do this in more than one batch, depending on the size of your food processor.
  6. Pour soup back into pot and keep over heat for another 10-15 minutes, adding grating cheese to your liking.  I used maybe an ounce or two.  Add salt and pepper, as desired.
  7. Serve hot with some chewy sourdough, or try it cold with a dollop of lowfat greek yogurt and some stoned wheat thins.


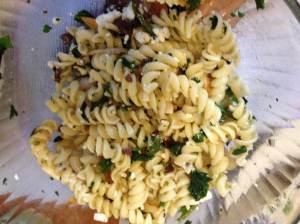
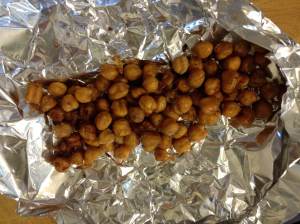
Aaaand last, but not least: Greek pasta salad with roasted ramp bulbs!

photo3 (2)

+

photo4 (1)

=

photo2 (4)

!!!

You will need:

  • 1 can chickpeas, drained and rinsed
  • 2 1/2 tbsp. olive oil
  • 1 tsp garlic powder
  • 10-12 ramp bulbs, halved or quartered lengthwise
  • Spinach or kale, julienned or just torn into small pieces (I used a combination)
  • 3-4 garlic cloves, skins on
  • 1 tbsp. oregano
  • 1 tsp. lemon zest
  • 1/4 lemon
  • 6-8 kalamata olives, roughly chopped
  • 3 cups uncooked short-cut pasta (I used fusilli)
  • 2 oz. feta cheese
  • Salt and pepper
  1. Preheat oven to 400.
  2. Cook pasta as directed on packaging.  Throw greens in a medium mesh strainer.  During the last 5 minutes of cooking pasta, rest the strainer in the pot above the water to steam.  Drain pasta, transfer to a large glass or ceramic bowl, put in fridge.
  3. In a medium bowl, toss chickpeas with 1 tbsp. olive oil, 1 tsp. garlic powder, a few dashes each of salt and pepper.  Lay out on baking sheet, making sure the chickpeas have some room between them.  Throw in oven for 15-20 minutes.
  4. Toss ramps with olive oil and lay out on aluminum foil.  Wrap garlic cloves in foil.
  5. Flip the chickpeas as best as you can.  Just tossing them a little on the baking sheet helps.  Add ramps and garlic to sheet.  Stick back in the oven for another 20 minutes, or until chickpeas are a dark tan color and crunchy.  Ramps should be browned on top, and if you cut into the garlic, it should be spreadable.  I suggest transferring the baking sheet to the top rung for the last 20 minutes.
  6. In a small bowl, mix 1 1/2 tbsp. olive oil, 1 tbsp. oregano, and 1 tsp. lemon zest.  Heat in microwave or on stove, just so the oregano and lemon is safe to eat.  Add juice from 1/4 lemon, olives, and roasted garlic.  The garlic won’t blend well, but it should break into small pieces.  You can always chop it before adding it.
  7. Throw the dressing, ramps, and feta into the pasta salad.  Salt and pepper it to your liking.  Refrigerate until ready to eat.
  8. After plating pasta, add 1/4 cup roasted chickpeas.  Happy eating!

I wasn’t thinking and added salt to the pasta and spinach before dressing it. This recipe has kalamata olives and feta in it; what was I thinking?  Nobody wants to eat a salt lick for dinner, so add the basics after you taste the finished product.

Just one thing to note: I’ve read that if you forage for ramps, you should just take the leaves.  The bulb can then produce more, and you haven’t ruined the supply.  I get it, I guess, but the bulb is my favorite part.  So just stick by the 1/3 rule.  I’m pretty sure the fleeting ramp season is finished in Southeastern Pennsylvania, but in Northern climates, you may just find a nice patch near your house.  You can also grow your own or maybe find them at the farmers’ market. If you’re neutropenic, just be sure to wear gloves and a mask when you’re foraging or going to the market; you don’t want to end up back in the hospital!