Fall Fruit and One Furry Fella

Yikes.  It’s been over two months since I’ve last written on this blog.  Once I stopped writing for a while, the idea of posting another update or recipe became more and more daunting.  On top of that, I wasn’t sure what to write about.  I wasn’t cooking much.

The past few months have had their share of highs and lows.  Being admitted to the hospital three times within a three week period was definitely a low.  So was spending a consecutive 25 days there and missing my sister’s wedding.  But my family visited frequently, I saw friends I hadn’t seen in a long while, and… (drumroll please!) I finished intensive chemotherapy!!

Huh?

Since last January, my chemo schedule has been pretty rough.  I hadn’t had too many healthy days, and I constantly camped out in bed.  Many weeks included 3 or 4 trips to outpatient therapy for chemo or blood, and I think we all know how prone to fevers I am.  Lots of time spent in the hospital.  Even when I was given drugs that normally help or don’t hurt too much, my reaction was quite the opposite.  So I’m glad to have that chapter behind me.

Now, once my counts recover and I can resume treatment, I will have two years of maintenance therapy to get through before I can say, “Phew!”  This treatment isn’t meant to bring down my blood counts or make me feel ill, so if it does either of these things, I will most likely take lower doses.  Unfortunately, some of the main drugs I will be taking are ones to which I respond poorly.  I’m hoping that taking lower doses will mitigate those side effects.  Because this therapy is primarily meant to maintain my remission, I get to regain my strength, grow my hair out, eventually go back to work, and travel a bit.  I have never been (and never will be) more excited to spend Christmas in Schenectady.

But in the meantime, I’m happy to hang out with Winston a.k.a. Mr. Wubbie a.k.a. Bubba Ghanouj.  This is what he’s been up to lately:

This slideshow requires JavaScript.

It’s a pretty chill hangout.

I’ve had a nice break from chemo now, and I have a few more days to enjoy it (my treatment resumes this Thursday!)  So I’ve gone back to the kitchen, trying out some Fall-inspired recipes and drinking lots of cinnamon tea.  Below are a few ideas that make eating a neutropenic diet a lot more enjoyable this time of year.


One of my favorite things about Fall is the abundance of apples.  They’re my favorite fruit, hands-down.  The season brings so many different types, you could cut up one of each and serve an apple fruit salad.  Southwestern PA has its share of tasty varieties, but nothing compares to an apple from Western NY.  I’m sorry folks, it’s true.  My mom recently brought down a bag of baking apples, and the minute I sliced into the first one, I did the happy dance.  They smell so floral, yet earthy.  Basically the best thing ever.

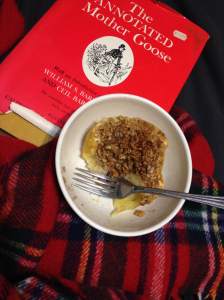
Right now, as my counts recover, I’m slightly neutropenic.  I’ll eat a raw apple here and there (very well scrubbed!!), but I want to be cautious because, as I’ve learned time and time again, hospital bills are expensive.  So apple sauce; apples, sausage, and cabbage; and baked apples are my go-to’s.  I made the latter a few nights ago, just using whatever I had around.  Here’s a rough recipe:

Ingredients:

  • 2 baking apples (I used a few different green varieties)
  • 2 handfuls of raw walnuts, about 1/2 cup
  • 2-3 handfuls of Quaker oatmeal squares (Yes, the cereal.  I only had steel-cut oats, and that didn’t seem appetizing.)
  • 3-4 tbsp. maple sugar (Brown sugar is fine, but again, I had none on-hand.)
  • 1 1/2 tsp. cinnamon
  • Dash of nutmeg
  • Dash of allspice
  • 2 tbsp. butter
  1. Preheat oven to 375, and put on water to boil.
  2. Slice apples in half and scoop out core.  Arrange them in a shallow glass or Corningware dish, skin facing down.
  3. Roughly pulse dry ingredients in a food processor.
  4. Pour mixture into apple halves, heaping any extra on top.
  5. Top each half with 1/2 tbsp. butter.
  6. Pour 1/4 cup boiling water into the bottom of the pan.  Bake in oven for 30-45 minutes, or until apple is soft, but not falling apart.
Perfect with a good book.

Perfect with a good book.

The crunch of the topping contrasts the apple’s soft texture so well.  Don’t overdo the nutmeg and allspice, or else it will taste bitter, but I say add more cinnamon if you want!  ‘Tis the season.

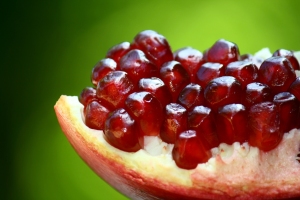
If you really want some fresh fruit and are really tired of eating bananas and oranges, as I certainly am, eat a pomegranate.

Supposedly, every pomegranate has 613 seeds.  I dont know if I believe that.

Supposedly, every pomegranate has 613 seeds. I don’t know if I believe that.

The thick skin makes it neutropenic-friendly.  I know what you’re thinking- easier said than done.  That’s because you’ve been deseeding your pomegranates by breaking them apart in a bowl of water and sifting the flesh off the top.  Well, be glad you’ve read this post this far, because boy, do I have a treat for you.  I found this video about a month ago and haven’t feared picking up the fruit at the market since. Just score it around the center, pull it apart, and smack it with a spoon until all the seeds fall out.

I leave you with the simplest pizza ever, as shared with me by my friend Christina.  My boyfriend and I made it a few weeks ago, and it’s definitely our new favorite.  And it involves two things not often allowed in a neutropenic diet: pears and gorgonzola!  I am a HUGE fan of all blue cheeses and have missed them dearly over the year.  But since this pizza is baked, it’s safe to eat.
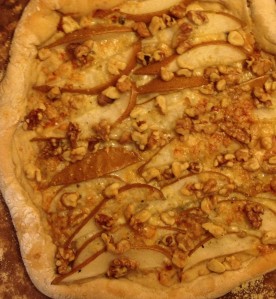
Just layer gorgonzola, pear, then gorgonzola again.  Bake at 400 for 10-13 minutes, then add walnut pieces for the last few minutes.

Just layer gorgonzola, pear, then gorgonzola again. Bake at 400 for 10-13 minutes, then add walnut pieces for the last few minutes.

We waited to take it out of the oven until all of the cheese was bubbly.  There were no leftovers.

I will plan to write an update shortly after my maintenance phase begins.  Thanks for reading, and enjoy these Fall fruits!
 

Chemo, Cat, and (not) Cooking

Well, the last couple of weeks were quite a surprise!  When I first started treatment, I was told it gets easier and easier.  But since then, I’ve learned that you can’t expect anything. When I went in for my lumbar puncture, which includes an intrathecal methotrexate dose, I began a good two to three weeks in hell.  The first week, I hardly got out of bed.  When I did, my ears would close up, and I would get dizzy.  Meanwhile, I’ve been on steroids, so even though I haven’t done much activity, I am eating at least double what I would normally eat.  I was drinking Gatorade after Gatorade, especially when I woke up.  As disgusting as it is, it’s the go-to for early morning hydration!  Now, my heart rate is at a scary 140, so today is all about fluids and rest.

In other news, my boyfriend and I adopted a cat!  His name is Winston, and he’s a 5-year-old (mostly) Maine Coon.  He’s quite the gentleman, although he pushes the envelope a bit more each day.  He loves sleeping under the bed in this hot weather, and I don’t blame him.  But he also enjoys being brushed and pet.  In fact, our vet told us that his friendliness and relaxed attitude is even an anomaly for his breed!  I think we lucked out. 

16 pounds of love and cuddles!

16 pounds of love and cuddles!

He’s been great company, even if he wakes me up at six for breakfast.  Although I haven’t been sleeping much anyway, so half the time, I’m already awake.

On Tuesday, I received another dose of both vincristine and doxorubicin.  They’re not the worst, so I have a bit of energy today.  Mostly, though, I’ve been staying out of the kitchen and holing myself up in our air-conditioned room.

In my last post, I promised the recipe for a neutropenic-friendly zucchini baba ghannouj.  So while I haven’t been able to make it again and photograph the steps, I shall deliver!  This dish is best to make on a cooler day, as the zucchini needs to stay in the oven for quite a while.

You will need:

  • about 2-3 pounds of zucchini
  • one head of garlic
  • juice of one lemon, plus some zest
  • 1/4 cup olive oil, plus some to taste
  • 1/4 cup tahini
  • 2 tbsp. cumin
  • 1 tbsp. paprika
  • fresh ground pepper
  • sea salt
  1. Preheat oven to 450º.  Cut zucchini in half lengthwise, and toss with about half of the olive oil.
  2. Rub half the cumin on inside of zucchini, and place on baking sheet.  I like to place it cumin-side down, so extra water can flow out.  But if you like the thinner consistency, flip it.
  3. Cut the top off the garlic head.  Create a bowl out of aluminum foil, and place the head inside.  Top with remaining olive oil, most of the lemon juice, salt, and pepper.  Fold over foil and place on baking sheet.
  4. Roast the zucchini until it looks like the skin is falling in.  Poke with a fork; you want a soft consistency. Roast the garlic until the cloves are soft.  This step can take upwards of an hour, so be patient.  Let cool.
  5. Scoop out zucchini from skin and place in blender or food processor. Add cloves.  I also like to throw in any leftover marinade from the foil, as well as any brown bits from the pan.
  6. Add remaining lemon juice, cumin, tahini, and more salt and pepper to taste.  Blend well.
  7. Taste, and add ingredients as you like.  Chill in fridge.  Before serving, drizzle with more olive oil and top with salt, pepper, and paprika.  Add lemon zest if you like, but wash well, as it’s technically not neutropenic-friendly.  I keep washed rinds in the freezer, which kills any bacteria.

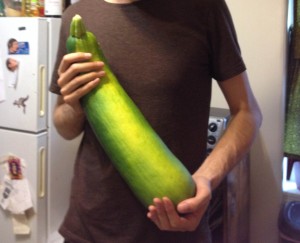
Our huge 18" zucchini!

Our huge 18″ zucchini!

I shared this last week, but this is what the baba ghannouj will look like.

I shared this last time, but the stuff in the middle is the baba ghannouj.

Finally, I want to thank everyone who has been reading my blog.  I have over 1,000 views, which is an exciting and inspiring benchmark! I’m hoping to get back on the cooking train soon, so I can share more recipes and ideas with you all.  In the meantime, happy cooking!


Don’t Buy…DIY!

I’ll be honest- I’ve just started to cook again these last several days, after a horrible phase of treatment and a trip to the hospital.  Methotrexate is my biggest rival, and if you don’t know what it is, I hope you never have to. Hint #1 that it will make you feel like curling up and hibernating: the IV infusion looks like lemon-lime Gatorade is about to run through your veins. Funny, because I often count on Gatorade to make me feel better.

HOWEVER, I did make two snacks that I would normally buy from the store: popsicles and crackers. That about evens it out, right? They are so easy to make, and doing it yourself means that you only have yourself to blame when they aren’t sweet/savory/creamy/crunchy enough!

Also, popsicles and crackers happen to be the world’s top go-to foods when someone’s sick.*

*Not a fact, but probably.

My birthday was on the 4th, and my wonderful boyfriend bought me a Zoku popsicle maker. I’ve been crazy about popsicles my whole life and have fond memories of sharing one with my childhood dog on super hot days (like you never did the same thing…)  After a few discouraging tries- you really have to blend the ingredients and store the pop maker in the back of your freezer– I made a delicious frozen treat from fresh, local ingredients, and with a secret helping of protein!  The best part is, you can just use whatever’s lying around.

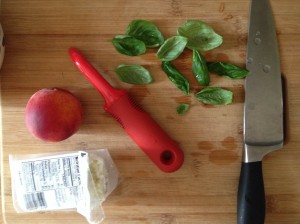
With just a few ingredients...

With just a few ingredients…

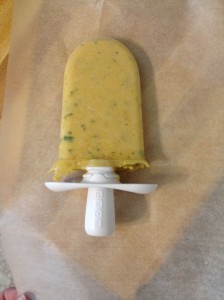
I made a wonderful peach, basil, and goat cheese popsicle!

I made a wonderful peach, basil, and goat cheese popsicle!  Adding a bit of almond milk keeps it creamy.

This has been a saving grace because most store-bought popsicles have too much citric acid in it, and they irritate an already sensitive GI tract.  If you like a bit of decadence, try blending some cocoa, milk, peanut butter, a dash of salt, and your favorite sweetener.  It makes for a nice fudge pop!

Since I had chemo on my birthday, we stayed in that night and made pizzas.  Super fancy delicious pizzas because I was feeling well enough to eat something flavorful. We topped them with goat cheese, sun-dried tomatoes, ramp leaves (had some in the freezer), mushrooms, garlic, onion, prosciutto, and truffle oil!  I ate the leftovers for breakfast.

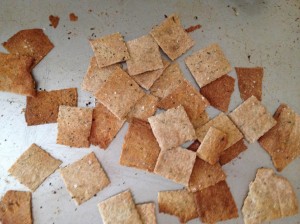
But we still had a small ball of dough left, so I decided to make some homemade crackers!  All you have to do is roll the dough out SUPER thin and bake it at 400º until golden brown and crispy.  Keep watching them, though- those suckers can go from perfection to overdone in seconds.

Rustic.

Rustic beauties.

As I wasn’t too keen on protein this week, I hid some extra grams in the crackers, too.  I shredded about an ounce of cheese and folded it into the dough with some sage and thyme.  Before putting it in the oven, I sprinkled some sea salt and fresh ground pepper over the sheet.  I did cut lines in the dough, so that they’d easily break into squares.  However, the outside cooked much faster.  Next time, I will separate the squares for more even baking.

If you’re not into cheese, try adding nutritional yeast instead.  It will give you that same nutty flavor and a nice helping of protein.  In a few months, it will be pumpkin season- adding a few spoonfuls of canned pumpkin, a bit of brown sugar, and your favorite winter spices, will turn this snack into a sweet treat.

So there you have it:

  • No more spending tons of money on these easy-to-make snacks.
  • You can finally eat popsicles without irritating your stomach.
  • Don’t want to eat tons of protein?  That’s OK- you can get protein, anyway!

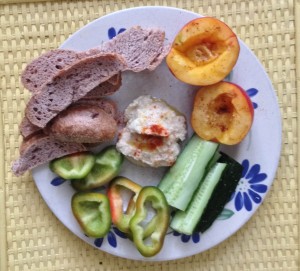
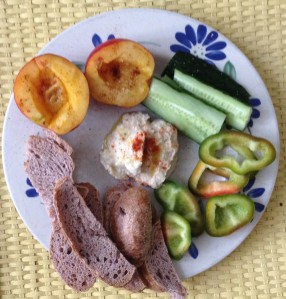
Well, I shall leave you with a bit of bragging: I’m not neutropenic right now!  I have been going crazy over fresh produce.  Here’s what I had for lunch today:

IMG_0241

Zucchini baba ghannouj with little toasts, fresh veggies, and a nectarine sprinkled with chili powder for dessert.  The baba ghannouj can be made neutropenic-friendly quite easily.  Stay tuned for the recipe!


Protein Pushin’

First of all- thank you thank you everyone for all of your kind compliments regarding my last blog post!  You really know how to boost my self-esteem!  I wasn’t sure if I should post a personal essay on this blog, as it’s not related to food, but I’m pretty happy I did it anyway.

Secondly- Sorry it’s been SO LONG since I’ve posted last.  This phase of chemo is kicking my a$$.  I am so tired all of the time.  I even had a little stint in the hospital a few weeks ago- you know, for old time’s sake.

But I feel like I’ve spent one day too many away from here and must get back to the food!  Which is a bit hard, as I’ve mostly been hiding in our air-conditioned bedroom for the last couple of weeks and have NO desire to go cook something up.  It’s days like these when I daydream about moving back home.  At least in the Finger Lakes, it gets cooler at night.  Can someone please call Harrisburg and tell them to TURN IT DOWN A NOTCH?!

Either my desire to eat bland foods has serendipitously coincided with this part of summer, or the heat itself is steering me away from anything the least bit exciting.  In the end, sticking to bland foods is normal enough in the chemo world.  We’re all looking for ways to increase our protein intake while not wanting to eat at all.  So today, I’ve decided to share my top five ways to feed those muscles without having to deal with lots of flavor.

  1. Nutritional Yeast or “Nooch”:  If you’re vegan or vegetarian, you probably sprinkle this stuff on everything.  I love it on a bowl of popcorn with a drizzle of soy sauce or mixed into a hearty winter soup.  It has a cheesy, nutty flavor, but it’s mild enough that you can hide it in just about anything.  Unlike baking yeast, this stuff is deactivated and doesn’t need to be cooked.  You can even sprinkle it on toast with a bit of olive oil.
    The Push: One ounce gives you 7g of fiber and 14g of protein!
    Other benefits: Vitamin B12, all 9 amino acids that human bodies can’t produce, and a fair amount of iron.
  2. Chickpeas: I’ve been a chickpea fan since I first developed teeth.  They’re so mild and comforting, and you can use them in a myriad of dishes.  I often just eat them hot with a dash of salt.  If you like hummus, try making it at home with a higher ratio of chickpeas to other ingredients.  It holds together better because of the thickness, which allows you to add a nice big serving into your next sandwich.
    The Push: One cup gives you 12g of fiber and 15g of protein!
    Other benefits: Lots of calcium, magnesium, and phosphorus for bone health, and a banana’s worth of potassium.
  3. Eggs: We’ve all seen the commercials.  We know what’s up with eggs.  I eat them almost every day for breakfast, usually on a tortilla with some salsa and low-fat Greek yogurt.  But they’re also super easy to add in other dishes to add more bulk to your diet.  I often crack an egg into my ramen before taking it off the stove.  You can also scramble them and add them to pasta dishes, throw them into homemade maki rolls (Korean-style), or crumble a few hard boiled ones into potato salad.
    The Push: One egg has 6g of protein.
    Other benefits: I can’t even list all of the great benefits.  So I’ll let Canada do the talking.  So many nutrients!  Most of them are in the yolk, though, so don’t skip out on that.  Besides, it’s the best part.
  4. Greek yogurt: My favorite is Fage’s 2% plain yogurt.  It’s thick and creamy, and it can be eaten in so many dishes or on its own!  I sometimes mix it with some salsa for a quick dip or scoop it on whole wheat pancakes with some berry compote for a very satisfying breakfast.  You could also add a few scoops to your soup, adding protein and cooling it off at the same time.  Just don’t go for fat-free; it won’t fill you up, and it often has more sugar in it.
    The Push: One cup has 23g of protein.
    Other benefits: You can get 25% of your daily calcium needs from one cup!  Also, probiotics will help your digestive system stay on track.  For some reason, yogurt is allowed in neutropenic diets, but no other foods high in probiotics are.  I say take it!
  5. Oatmeal: High in carbohydrates, protein, AND fiber, oatmeal is the breakfast (or lunch/dinner) of champions.  I often order this at the hospital.  If you leave the toppings out, it’s so easy to eat spoonful after spoonful of oatmeal, even when you’re nauseous.  In fact, I like to add some brown sugar when I am feeling a bit queasy; it helps settle my stomach.
    The Push: One cup has 6g of protein and 4g of fiber.  I eat about 1.5-2 cups when I’m very hungry.
    Other benefits:  One cup has 77% of your recommended iron intake.  And anyone have peripheral neuropathy?!  It also has 35% of your recommended Vitamin B-6 intake, too!  I know how much taking that little vitamin pill sucks.
photo1 (8)

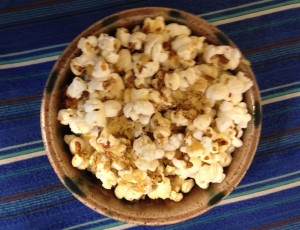
MMMMM nooch on the popcorn! I popped this bowl in 1/2 chili oil and 1/2 toasted sesame oil, then topped it with nutritional yeast and a splash of soy sauce.

So there you have it!  Five ways to get all the protein you need without having to hide from those crippling kitchen aromas!

I’m 24 Years Old, and I Have Hot Flashes.

My body tends to overheat.  Even in the Winter, I often keep a fan on while I sleep.  I daydream about being back in Western New York, where things are much cooler than they are here.  On top of this predisposition, my chemo gives me hot flashes.  In short, I am constantly trying to cool down.

I’ve noticed that the most effective methods are those that bring my internal temperature down.  One method is pretty kooky: I actually will close my eyes and pretend I’m skiing in the Alps or on an expedition to Mt. Everest’s highest peak.  This seriously works.  When it’s freezing out, I think about lying on a hot Mediterranean beach.  I think maybe it just calms me down.

The other is eating frozen stuff.  All the time.  Iced is not good enough for me.  So I thought I’d share some of the things I freeze:

  • Fruit puree and bananas: I explained the purees in my first blog post.  By freezing everything that would go in a smoothie, and adding a ton of ice, I get all the taste while going on a short vacation to Antarctica, too.  Also, using less ice yields a thicker, creamier treat, much like sorbet.
  • Lemon water: After juicing and zesting lemons for lemonade/future cooking, I boil the leftover scraps for about 10 minutes.  It doesn’t get bitter, and it adds a soft tang to the water.  Just freeze in your ice tray, and either pop them in the blender with some sweetener, or add them to a glass of water.
  • Coffee and tea: Who doesn’t like a Dunkin’ Donuts Coffee Coolatta?  They’re so creamy and refreshing!  But also full of fat, served in throwaway plastic cups, and in a public place you probably have to drive to.  The trick to making one at home is not to add ice to cold coffee, but to freeze coffee in an ice tray and blend it up with a banana (not frozen) and some milk.  Just make sure to chop up the ice in the blender first.  I only drink tea these days, so I use that instead.  Yesterday, I brewed 2 cups using 2 heaping spoonfuls of Earl Grey and 1 of dried lavender.  This morning, I blended it with a banana and some almond milk.  A perfect way to wake up.

Other ideas: hot chocolate, nut butter and banana puree, vegetable juice, infused simple syrups…

Let me know what you do when you get hot flashes!

Also, I wonder if this could be a good way to store a large batch of compost tea?

One more thing: I am just now discovering the world of PICC line couture.  I was so tired of that itchy gauze that was NOT helping my skin rashes from the dressings.  So I started wrapping my extensions in my Lululemon wristband keyholder.  Then I found an old hair band and decided, hey, that would be a nice cover!  I’m going to start making some new ones from fabric ends and elastic.  They let the site breathe so much more, and I can move it down my arm to give my skin a break.  If you’re on Pinterest, search ‘PICC line covers’, and you’ll see all sorts of creative stuff!

photo1 (7)

A nice little bow over my dressing 😀

My Neutropenia Took the Long Weekend Off and Left Me Home Alone

Hoooooly mackerel.  Tomorrow’s the first day of SUMMER? ALREADY?

But what better time to not be neutropenic!  I got a call from my doctor’s office this morning, letting me know that my counts look great, and that my neutrophil count is 1700!  So I immediately got out of bed and went to the co-op to buy some of my favorite raw produce: a red pepper, a cucumber, tomatoes on the vine, snow peas, plums, and peaches.  I usually try to eat seasonally-appropriate raw produce, but who knows when I’ll get another chance to binge on this stuff?  My chemo resumes on Monday, so I’ll be back to cooking my veggies soon enough.  What I really wanted was Han Dynasty’s spicy cucumbers (thank you coworkers for getting me hooked).  Well, I wasn’t going to get delivery from them two nights in a row, so my sister and I made our own following this recipe.  They actually tasted pretty good!  We just skinned the cukes and added more chili oil, sugar, and vinegar.

It’s not a surprise that summer creeped up on me.  These days, I hardly know which day of the week it is.  I’m going a little stir-crazy at home.  I’ve been doing a lot of cooking and cleaning, which can either be very calming or maddening.  It’s a crapshoot.  Sometimes I just go lay down in our air-conditioned room for a really long time, but then I feel guilty for being lazy when everyone else is working!

downton-abbey-lady-violet-GIF-season-1-episode-2-2


Well, Spring’s nearly over.  So I shall not procrastinate any further in sharing a few Spring-inspired pasta salads that have been grazing my palate lately.  Most, if not all, of this produce is still growing locally in Southeastern PA.  I’m not sure about anything below Delaware.

Spring Vegetable Salad with Homemade Lemony Ricotta

Lately, I have been learning that many of the ingredients I use are almost suspiciously easy to make. I mean, they can’t taste as good as store-bought, right?  Don’t store-bought items have a better balance and texture because experts make them?  WRONG.  I have been shaking my head in embarrassment for the last month because I can’t believe I would shell out the big bucks for these things at Whole Paycheck.  Examples: nut/seed butters, tahini, fruit leather, lemonade, iced tea, pickled anything, tortillas, and ricotta. (I still buy fruit leather because I’m scared that if I keep my oven on all day, I’ll burn down the house.  But it really is easy to make.)

The ricotta I use in this recipe isn’t traditional, real Italian ricotta.  It’s the ricotta lookalike we buy in tubs from the supermarket.  The real stuff uses whey protein left over from making other dairy products.  Last year, I met a woman whose family makes the real stuff near Philly, and when I told her that I loved it, the only thing she said back was, “It’s pronounced ri-cote.”  Which makes me never want to eat the real ricotta ever again.  It’s now associated with condescending snobs.

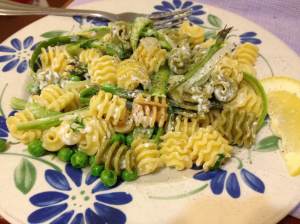
So here’s the recipe for a friendly ricotta pasta salad 🙂  In fact, I made it using a 50% off quart of milk, so there’s not a lick of snobbery in it.  I was the only one home the night I made it, so I made one serving.  Just multiply everything by # of eaters.

Ricotta: I used this recipe from foodandstyle.com.  Add fresh lemon juice as your acid.  Mine didn’t create big curds, and it took about an hour of draining to get even a creamy consistency.  Here are my suggestions to speed up the process: use a wide cheesecloth or only one layer of cloth, add a bit more lemon juice, make sure you do only one or two stirs when you add the acid.

  • 3 asparagus stalks, shaved
  • 3-4 paper-thin slices of Vidalia onion
  • 1/3 cup frozen or fresh peas
  • 3-4 sprigs of dill, tear off branches
  • 1 cup pasta (I used quinoa fusille)
  • 2 tbsp homemade ricotta
  • sliced lemon
  • 1 tbsp olive oil
  • sea salt
  • fresh ground pepper
  1. Throw first 4 ingredients in a colander.  Leave in sink.
  2. Cook pasta until al dente, adding some sea salt and a splash of olive oil.
  3. When pasta is cooked, keep it in pot and bring the water back to a rapid boil
  4. Remove from heat and pour boiling water/pasta into colander, creating a steady stream over all the veggies.
  5. Toss pasta and veggies a few times to remove excess water, then add ricotta and toss again.
  6. Serve cold or hot with fresh lemon wedge, fresh ground pepper, and sea salt.

photo5 (2)

Easy peas-y.

Cooking fail: I got really excited about having made ricotta, so I thought, Hmm, what would happen if I used coconut milk instead?  Whenever I overheat soup with a coconut base, it curdles… I completely redid the recipe, using coconut milk.  Vegans, IT DOES NOT CURDLE.  It actually tastes awful.  I even tried to save it buy cooking it down to a spread consistency and adding herbs, salt, and pepper (I was inspired by Daiya’s new chive and herb ‘cream cheese’ spread, which I don’t even like…)  The milk was too sweet, and it didn’t lose any of that exotic pina colada element.  No, now it was just mixed with things I want on a bagel.  Good thing it was only $1 at Big Lots!

But, vegans, don’t leave just yet.  This one’s for you.

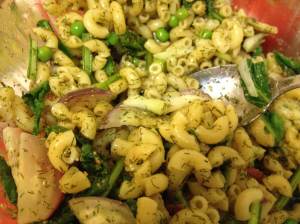
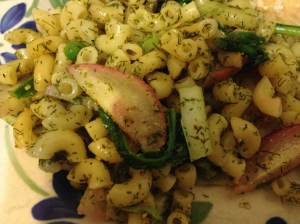
Pasta Salad with Vegan Cream Sauce

A week or so ago, my sister and her partner came over for dinner.  Her partner is vegan (as was I for about 5 years, so I have some knowledge here), and I didn’t realize she was coming until that afternoon.  So I whipped this up on the fly, and it worked really well.

Most people automatically think of cashews when they see a vegan cream sauce.  Cashews are great, and they contain good fats, but I don’t want that much fat all over my pasta.  I also had a jar of raw almonds staring me in the face, so the solution was pretty obvious.

  • 1 ½ cups almonds
  • 1 tbsp. fresh lemon juice
  • ¼ cup olive oil, plus some for garnishing and sautéing herbs
  • 2 tbsp. basil
  • 1 tbsp. oregano
  • 1 ½ tbsp. sage
  • 1 tbsp. garlic powder, or 2-3 cloves of garlic, pressed
  • salt and pepper to taste
  • water
  • ¼ cup nutritional yeast
  • 3 cups macaroni
  • 2 cups chickpeas, drained and rinsed
  • 1 ½ cups spinach
  • 1 ½ cups peas
  • 2 spring onions
  • 2 tbsp. lemon zest and lemon wedges for garnishing
  1. Blanch the almonds: Fill a medium pot half-full with water.  While bringing it to a boil over high heat, get a bowl of ice water ready.  Add the almonds to the pot, keeping a rolling boil for 1-2 minutes.  Remove from heat, quickly drain, and pour the almonds into the ice water.  Using your hands, squeeze the skin off the almonds.
  2. Use excess ice water to cook the macaroni al dente, adding fresh or frozen peas, spinach, and coarsely chopped onions about 5 minutes in.  Drain.
  3. Coarsely grind the basil, oregano, and sage, using a mortar and pestle.  Heat a small skillet over medium heat.  Add 2 tbsp. of olive oil in the pan, and add the herbs and garlic.  Gently saute them for 30 seconds or so.
  4. Using a food processor or blender, blend the almonds, herbs, nutritional yeast, lemon juice, and 1/4 cup olive oil.  Add water as needed, until you get a thick and creamy sauce.  Season with salt and pepper, and blend again.
  5. Toss chickpeas in with the macaroni, and add 1/2 of the sauce.
  6. Serve cold or hot, with more sauce on top, grated lemon zest*, a lemon wedge, and a drizzle of olive oil.

photo7 (1)

*When my counts are low, I wash the lemon skin really well and pour boiling water over them for about 30 secs.  It helps loosen up the inside for juicing, too.

And to end, here are some of my favorite pesto sauces.  The key to these is to wash everything thoroughly, then freeze them first!  If you want to eat it right away, just make sure you blanch any raw produce.  I usually make pestos when something’s been sitting in my fridge for a while and I don’t want it to go bad, so freezing them is part of my plan.

Fennel Frond Pesto

I love fennel.  It’s so bright and crispy, and the tender anise flavor is just enough to lighten up a dish.  My favorite way to eat it is raw with a drizzle of olive oil, a tiny bit of lemon juice, and a sprinkle of sea salt.  These days, I’m mostly pan-searing it or caramelizing it with some onions.

The one thing I don’t get is why everyone is so crazy about using fronds as a garnish.  They have such a mild taste, I can’t even tell they’re there.  But I also hate to see them go to waste.  In pesto form, the fronds are concentrated enough that they lend a mellow lift to a heavy dish, like pasta.  And they take up a lot less space in your freezer!

Just mix the following in a food processor or blender:

  • 6-8 cups roughly chopped fennel fronds
  • ½ cup unsalted roasted almonds
  • 2-3 garlic cloves
  • ¼ cup olive oil
  • ½ lemon, juiced
  • salt
  • pepper

I made this with about 1/4 cup almonds, and the flavor was hovering too far over on the fragrant side.  Double the nuts, and it brings it back down to earth.

photo11

photo12


Omnomnomnomnom.  For this one, I mixed in blanched radishes, radish greens, onions, and peas.  The fennel’s slightly rough texture perfectly matches the ingredients’ zesty sharpness.

Sundried Tomato Pesto

Every summer, my aunt harvests pounds upon pounds of tomatoes from her garden.  It’s almost unreal, as everyone else I know seems to uncover a new issue with the plants every year they try to grow them.  Anyway, she dehydrates them and cans some, and my mom gets some every year.  Well, when I was living with my parents, I would go into the pantry and snack on all of the dehydrated ones.  I know they’re not meant to be eaten as is, but I love them- think fruit leather, but not sugary and kind of sour.

My aunt gave me my own bag this year, hoping that would ward me off from mom’s stash.  I decided to be an adult and actually make something with them. And we had some droopy kale in our crisper.

  • 4 leaves kale, chopped
  • ½ cup chopped sundried or dehydrated tomatoes
  • 1/4 cup olive oil or oil that the sundried tomatoes come with
  • 3 garlic cloves
  • 2 oz. fresh mozzarella
  • 1 tbsp. dried oregano
  • 1 tbsp. dried basil
  • salt
  • pepper

Since my tomatoes didn’t come in olive oil, I poured 1/8 cup into the bag, along with oregano, basil, salt, and pepper. I smushed it all together and left sitting out in an airtight bag for a few hours.  It softens the tomatoes and infuses the flavors.  Then I just threw everything in my Ninja.

I used 2 leaves of kale, 1/8 cup of olive oil, and 1 oz. of mozzarella, and the taste was very tangy.  I stuffed dumplings with it, and it totally worked.  But if you want something to toss into a warm pasta dish with other vegetables, mellow it out with more oil and cheese.

Pasta salad satisfies my need for fresh crunchiness, and it makes for easy leftovers.  The pasta party lasts all summer long in my kitchen!

To end, I will leave you with a bit of wisdom: Don’t ever believe those health food bloggers who say that blending frozen bananas, cocoa powder, almond milk, vanilla extract, and ice, creates a healthy dessert that tastes just like a Frosty.  I’m eating one right now, and it just tastes like diet food.  Ick.

Ramps, ramps, everywhere!

Here’s the deal.  A lot of my ideas were thought up long before I decided to start a blog.  Which means there’s often no photographic evidence and almost no exact measurements.  So, I propose you use your imagination on a lot of this.  Like reading a book! (I’ll get better, I promise.)

Now that we’ve got that settled, let’s talk ramps.  Some call them wild leeks or wild onions.  They’re one of the most tender of the onion family, and they’re one of the first signs of Spring.  Like all early Spring veggies, they taste light and fresh, but they also pack a nice funky punch.  Because of their garlicky odor and oniony/garlicky taste, they can be swapped into many dishes for a lighter refreshing quality.  The bulbs are also juicy and so yummy raw.  But we can’t eat them raw, can we?  So we gotta get down ‘n’ dirty in the kitchen and find some ways to enjoy them thoroughly cooked.

First, can I just say that I LOVE washing ramps?  They get really dirty and there’s a slimy film around the bottom that you just sort of pinch off.  And the bulbs are so smooth, the dirt just slides right off.  And the roots snap off so easily and so, so cleanly. In short, cooking with ramps is a twofer: you get a delicious meal AND free therapy.

Our fridge has had an overload of ramps this season, both with the leaves and without.  Here, I’m highlighting just three of the dishes I’ve made so far: ramp pizza, ramp and pea soup, and Greek pasta salad with roasted ramp bulbs.  I only took pictures of the pasta salad.  (Let me remind you of the first paragraph I wrote.)

LOOK AT THESE BEAUTIES!!!

Source: wildwestvirginiaramps.com


Ramp Pizza:

I don’t have a real recipe for this, but I’ll just give you an idea of how I used them (fail), then suggest how you should actually use them (win).

First, I separated the greens and bulbs.  Then I sliced up the bulbs and sauteed them with mushrooms, onion, and garlic. (I’m a huge fan of alliums.)  I opted for a white pizza and added the sauteed veggies on top. **Always saute water-heavy veggies before putting them on a pizza crust, or you’re gonna have some soggy crust!

The green tops are more difficult.  For the first pizza, I left them whole and laid them from the center out for the last 5-7 minutes in the oven.  They were chewy, and the whole piece would come off with the first bite.  The second time, I tore them into small pieces and sauteed them with the rest of the veggies, adding them to the pizza in the beginning.  They were easier to eat, but they still remained somewhat chewy.  If that bothers you, you could leave them off…OR: make ramp pesto!

I’ve heard that ramp pesto is fabulous, and you could really throw in whole ramps, which is so much easier.  I’d suggest putting them in your food processor with some pine nuts, some olive oil, maybe some more herbs, and using it as the base sauce.

Source: lainesrecipebox.blogspot.com

Someone please get me more ramps so I can do this right!


Now that you’ve learned from my mistakes, let me wow you with the brightest, zippiest, snappiest soup ever to grace my kitchen.  Did I mention it’s super easy and is remarkably refreshing when served cold?  Here’s what you’ll need:

  • 2 cups frozen or fresh peas
  • 16 or so ramps (leaves and bulbs)
  • 1 yellow onion, coarsely chopped
  • 3-5 garlic cloves, minced or pressed
  • 3 cups chicken broth
  • 1 tbsp. butter
  • 2 tbsp. dried basil (Note: A strict neutropenic diet calls for all herbs to be cooked.  I don’t even bother getting fresh basil, especially since that hydroponic crap that’s suddenly EVERYWHERE tastes like nothing.  And smells like urine.)
  • Whatever grating cheese you have on-hand.
  • Salt and pepper
  1. Separate ramp bulbs and greens.  Chop up the bulbs and add them to your pile of chopped goodies (onions and garlic).  Chop or tear up the greens and set them aside.
  2. Grind the basil in a mortar and pestle.  Grind it REEL GOOD.
  3. Set your stock pot on medium-hight heat.  Sautee the bulbs, onions, and garlic in butter for 5-7 minutes.  You want them a little brown.
  4. Add the chicken broth, peas, and greens.  Bring to a boil, then lower the heat, cover, and let simmer 10-15 minutes.  Stir occasionally.
  5. Blend in food processor or immersion blender until thick, but still textured.  If you don’t trust your appliances, wrap a towel around the food processor so you don’t get flyaway hot soup in your face.  You also might have to do this in more than one batch, depending on the size of your food processor.
  6. Pour soup back into pot and keep over heat for another 10-15 minutes, adding grating cheese to your liking.  I used maybe an ounce or two.  Add salt and pepper, as desired.
  7. Serve hot with some chewy sourdough, or try it cold with a dollop of lowfat greek yogurt and some stoned wheat thins.


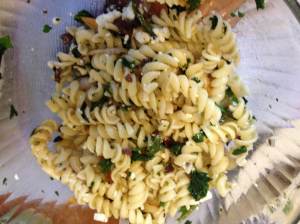
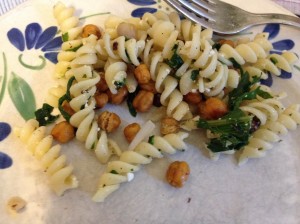
Aaaand last, but not least: Greek pasta salad with roasted ramp bulbs!

photo3 (2)

+

photo4 (1)

=

photo2 (4)

!!!

You will need:

  • 1 can chickpeas, drained and rinsed
  • 2 1/2 tbsp. olive oil
  • 1 tsp garlic powder
  • 10-12 ramp bulbs, halved or quartered lengthwise
  • Spinach or kale, julienned or just torn into small pieces (I used a combination)
  • 3-4 garlic cloves, skins on
  • 1 tbsp. oregano
  • 1 tsp. lemon zest
  • 1/4 lemon
  • 6-8 kalamata olives, roughly chopped
  • 3 cups uncooked short-cut pasta (I used fusilli)
  • 2 oz. feta cheese
  • Salt and pepper
  1. Preheat oven to 400.
  2. Cook pasta as directed on packaging.  Throw greens in a medium mesh strainer.  During the last 5 minutes of cooking pasta, rest the strainer in the pot above the water to steam.  Drain pasta, transfer to a large glass or ceramic bowl, put in fridge.
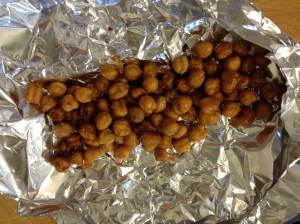
  3. In a medium bowl, toss chickpeas with 1 tbsp. olive oil, 1 tsp. garlic powder, a few dashes each of salt and pepper.  Lay out on baking sheet, making sure the chickpeas have some room between them.  Throw in oven for 15-20 minutes.
  4. Toss ramps with olive oil and lay out on aluminum foil.  Wrap garlic cloves in foil.
  5. Flip the chickpeas as best as you can.  Just tossing them a little on the baking sheet helps.  Add ramps and garlic to sheet.  Stick back in the oven for another 20 minutes, or until chickpeas are a dark tan color and crunchy.  Ramps should be browned on top, and if you cut into the garlic, it should be spreadable.  I suggest transferring the baking sheet to the top rung for the last 20 minutes.
  6. In a small bowl, mix 1 1/2 tbsp. olive oil, 1 tbsp. oregano, and 1 tsp. lemon zest.  Heat in microwave or on stove, just so the oregano and lemon is safe to eat.  Add juice from 1/4 lemon, olives, and roasted garlic.  The garlic won’t blend well, but it should break into small pieces.  You can always chop it before adding it.
  7. Throw the dressing, ramps, and feta into the pasta salad.  Salt and pepper it to your liking.  Refrigerate until ready to eat.
  8. After plating pasta, add 1/4 cup roasted chickpeas.  Happy eating!

I wasn’t thinking and added salt to the pasta and spinach before dressing it. This recipe has kalamata olives and feta in it; what was I thinking?  Nobody wants to eat a salt lick for dinner, so add the basics after you taste the finished product.

Just one thing to note: I’ve read that if you forage for ramps, you should just take the leaves.  The bulb can then produce more, and you haven’t ruined the supply.  I get it, I guess, but the bulb is my favorite part.  So just stick by the 1/3 rule.  I’m pretty sure the fleeting ramp season is finished in Southeastern Pennsylvania, but in Northern climates, you may just find a nice patch near your house.  You can also grow your own or maybe find them at the farmers’ market. If you’re neutropenic, just be sure to wear gloves and a mask when you’re foraging or going to the market; you don’t want to end up back in the hospital!